


DOM
Mastering the DOM: Concepts, Manipulation, and Its Evolution
When you start web development, especially front-end, one of the first major hurdles you encounter is the DOM (Document Object Model). Why do we need to manipulate the DOM with JavaScript, and why have modern frameworks like React and Vue introduced concepts like the Virtual DOM?
In this article, we’ll dive deep into the world of the DOM, starting with its fundamental concepts, moving to powerful control methods using JavaScript, and finally exploring the Shadow DOM, which ushered in the era of Web Components, and the Virtual DOM, the core of modern frameworks.
Part 1: What is the DOM? (Core Concepts and the Tree Structure)
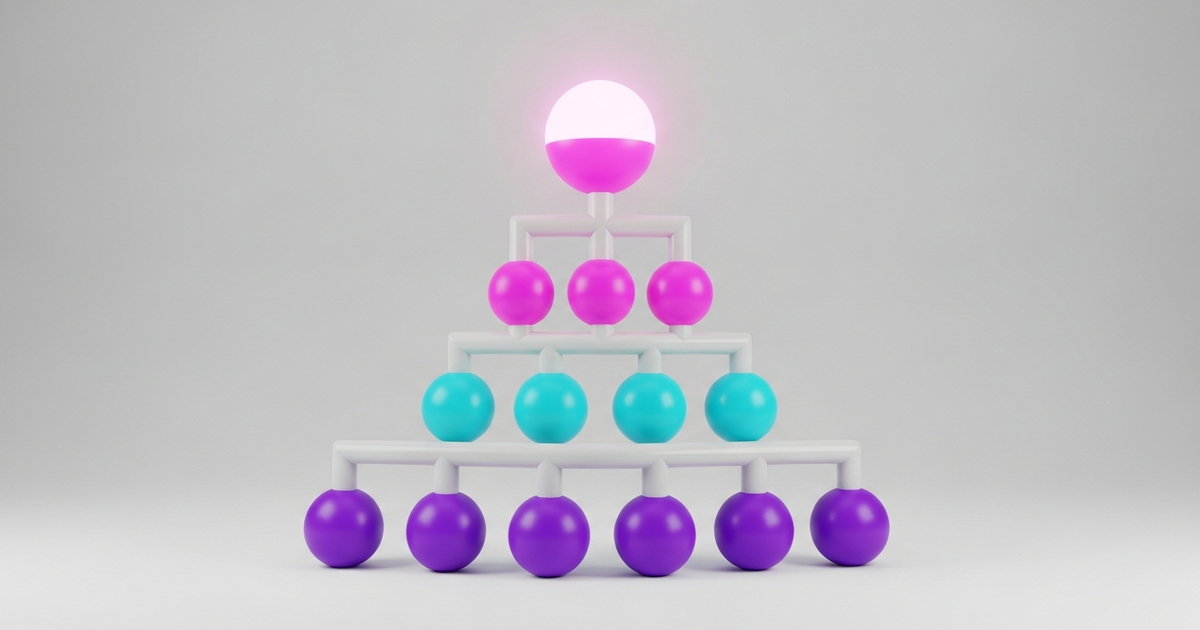
The DOM is a model that represents the structure of an HTML document as a tree of objects, allowing web browsers to understand and control the document. In simple terms, it’s a version of your HTML code translated into an object structure that JavaScript can understand.
The DOM is Like a Tree: The Tree Structure
The DOM structures a document like a giant tree. Each part of this tree—such as elements, text, and attributes—is represented by an object called a node.
At the very top is the document node, and below it, the <html> node acts as the root. The <html> node has child nodes like <head> and <body>, and <body> in turn has its own children like <h1> and <div>. These nodes form parent-child and sibling relationships, creating the structure of the entire document.
- Document Node: The top-level node of the DOM tree, representing the entire document (the
documentobject). - Element Node: Represents an HTML tag (e.g.,
<h1>,<div>,<li>). - Text Node: Represents the text content inside a tag.
- Attribute Node: Represents an element’s attribute (e.g.,
class,id,src).
Thanks to this tree structure, we can use JavaScript to precisely find a specific node, change its content, add new nodes, or delete existing ones.
Part 2: Manipulating the DOM with JavaScript
Bringing a static HTML document to life is all about DOM manipulation with JavaScript. Every process, from changing page content based on user actions to displaying new elements with data received from a server, is done through DOM manipulation.
Selecting & Traversing Elements
To manipulate the DOM, you first need to find the element you want to work with.
1
2
3
4
5
6
7
8
9
10
11
12
13
// Select an element by ID (the fastest and most common method)
const title = document.getElementById('main-title');

// Select a single element using a CSS selector (very useful)
const container = document.querySelector('.container');

// Select multiple elements using a CSS selector
const allItems = document.querySelectorAll('.list-item');

// Traverse from a selected element to its relatives
const parentOfTitle = title.parentNode; // Parent node
const firstChildOfContainer = container.firstElementChild; // First child element
const nextItem = allItems[0].nextElementSibling; // Next sibling element
querySelector and querySelectorAll are modern methods that let you use CSS selectors directly, making them incredibly powerful and convenient.
Creating & Adding Elements
You can create new HTML elements and add them to the page.
1
2
3
4
5
6
7
8
9
10
11
12
13
// 1. Create a new <li> element
const newItem = document.createElement('li');

// 2. Create a text node to fill its content
const itemText = document.createTextNode('New Item');
newItem.appendChild(itemText);

// 3. Add a class attribute
newItem.classList.add('list-item');

// 4. Append it to the desired location (inside a <ul> tag)
const list = document.querySelector('.my-list');
list.appendChild(newItem);
Modifying & Removing Elements
You can also change the content, attributes, and styles of existing elements, or remove them entirely.
1
2
3
4
5
6
7
8
9
10
11
12
13
14
15
16
const title = document.getElementById('main-title');

// Change content (using textContent is safer)
title.textContent = 'This is the new title!';

// Change attributes
const image = document.querySelector('img');
image.setAttribute('src', '/path/to/new-image.jpg');

// Change styles
title.style.color = 'blue';
title.style.fontSize = '24px';

// Remove an element
const itemToRemove = document.getElementById('item-to-delete');
itemToRemove.remove(); // The simplest method
Note: While the innerHTML property is convenient for inserting HTML tags as well as text, it can be vulnerable to XSS (Cross-Site Scripting) attacks if you insert user-provided input. It’s always safer to use textContent for untrusted data.
Part 3: The Evolution of the DOM: Shadow DOM and Virtual DOM
As web applications grew more complex, problems arose that the standard DOM couldn’t easily solve, namely encapsulation and performance. The concepts of the Shadow DOM and Virtual DOM were introduced to address these issues.
Shadow DOM: The King of Encapsulation
The Shadow DOM is a core technology of Web Components that allows you to create a “hidden” and independent DOM tree attached to a specific DOM element. This hidden tree operates in complete isolation from the main document’s DOM.
-
Concept: Think of the
<video>tag. You see the player controls—the play button, the timeline, the volume slider—but the dozens of<div>s and<input>s that make up these controls are not visible in your HTML. That’s because they are encapsulated within the<video>element’s Shadow DOM. -
Key Benefit: Perfect Encapsulation. Styles (CSS) inside the Shadow DOM don’t leak out, and styles from the main page don’t leak in. JavaScript is also isolated, allowing you to create reusable components that work without style conflicts or script errors even in large applications.
1
2
3
4
5
6
7
8
9
10
11
12
// Attach a Shadow DOM to the #shadow-host element
const host = document.querySelector('#shadow-host');
const shadowRoot = host.attachShadow({ mode: 'open' });

// Add an h2 element inside the Shadow DOM
shadowRoot.innerHTML = `
  <style>
    /* This style only applies inside the Shadow DOM. */
    h2 { color: red; }
  </style>
  <h2>This is a heading inside the Shadow DOM.</h2>
`;
Virtual DOM: The Blueprint for Performance
The Virtual DOM (VDOM) is an in-memory, virtual representation of the real DOM’s structure, stored as a JavaScript object. It’s not a browser standard but a programming pattern used by libraries and frameworks like React and Vue to optimize performance.
-
Concept: Manipulating the real DOM directly is an expensive (slow) operation. The VDOM works by first rendering the entire UI to an in-memory Virtual DOM whenever the state changes. It then compares this new Virtual DOM with the previous one to find only what has changed (a process called “Diffing”). Finally, it batches these changes and applies them to the real DOM all at once (a process called “Reconciliation”).
-
Key Benefit: Performance Optimization. The VDOM minimizes unnecessary and repetitive DOM manipulations, making the application more responsive. As a developer, you simply declare how the UI should look based on the state, and the Virtual DOM figures out the most efficient way to update the real DOM.
A Quick Comparison
| Feature | Standard DOM | Shadow DOM | Virtual DOM |
|---|---|---|---|
| Purpose | To represent and control the document’s structure | To encapsulate an element’s internal structure | To optimize DOM update performance |
| Key Benefit | The standard interface for web pages | Isolation of styles and scripts | Efficiently applies only what’s changed |
| Scope | Browser Standard | Browser Standard (Web Components) | A pattern in libraries/frameworks |
Conclusion
The DOM is the backbone of a web page and the sole channel through which JavaScript interacts with the web. Developers manipulate this DOM to create dynamic web pages.
However, as applications became more complex, the Shadow DOM emerged to create reusable, independent components, and the Virtual DOM was born as an innovative pattern to solve the performance degradation caused by frequent data changes.
Ultimately, all these technologies are the result of efforts to handle the DOM more efficiently and structurally. Therefore, even when using frameworks like React or Vue, a deep understanding of how the underlying DOM works is an essential skill for every front-end engineer.
DOM(문서 객체 모델) 완전 정복: 개념, 조작, 그리고 진화
웹 개발, 특히 프론트엔드 개발을 시작하면 가장 먼저 마주하게 되는 거대한 산이 바로 DOM(Document Object Model)입니다. 우리는 왜 자바스크립트로 DOM을 조작해야 하며, React나 Vue 같은 현대적인 프레임워크들은 왜 Virtual DOM이라는 개념을 도입했을까요?
이 글에서는 DOM의 근본적인 개념부터 시작해, 자바스크립트를 이용한 강력한 제어 방법, 그리고 웹 컴포넌트 시대를 연 Shadow DOM과 현대 프레임워크의 핵심인 Virtual DOM까지, DOM의 모든 것을 심도 있게 파헤쳐 보겠습니다.
1. DOM이란 무엇인가? (기본 개념과 트리 구조)
DOM은 웹 브라우저가 HTML 문서를 이해하고 제어할 수 있도록, 문서의 구조를 객체(Object)의 트리(Tree) 형태로 표현한 모델입니다. 즉, 우리가 작성한 HTML 코드를 자바스크립트가 알아들을 수 있는 객체 구조로 변환한 것이라고 생각하면 쉽습니다.
DOM은 나무와 같다: 트리 구조
DOM은 문서를 하나의 거대한 나무처럼 구조화합니다. 이 나무의 각 부분, 예를 들어 요소(Element), 텍스트, 속성 등은 모두 노드(Node)라는 객체로 표현됩니다.
가장 상위에는 document 노드가 있고, 그 아래로 <html> 노드가 뿌리(root) 역할을 합니다. <html>은 <head>와 <body>라는 자식 노드를 가지고, <body>는 다시 <h1>, <div> 같은 자식 노드들을 가집니다. 이 노드들은 서로 부모-자식, 형제 관계를 형성하며 전체 문서의 구조를 이룹니다.
- 문서 노드 (Document Node): DOM 트리의 최상위 노드로, 전체 문서를 나타냅니다. (
document객체) - 요소 노드 (Element Node): HTML 태그(
<h1>,<div>,<li>등)를 나타냅니다. - 텍스트 노드 (Text Node): 태그 안에 있는 텍스트를 나타냅니다.
- 속성 노드 (Attribute Node): 요소의 속성(
class,id,src등)을 나타냅니다.
이 트리 구조 덕분에 우리는 자바스크립트를 이용해 특정 노드를 정확히 찾아내고, 그 내용을 바꾸거나, 새로운 노드를 추가하거나, 기존 노드를 삭제할 수 있습니다.
2. 자바스크립트를 이용한 DOM 조작
정적인 HTML 문서에 생명을 불어넣는 것이 바로 자바스크립트를 통한 DOM 조작입니다. 사용자의 행동에 따라 페이지의 내용을 바꾸거나, 서버로부터 받은 데이터로 새로운 요소를 만들어 보여주는 모든 과정이 DOM 조작을 통해 이루어집니다.
요소 선택 및 탐색 (Selecting & Traversing)
DOM을 조작하려면 먼저 원하는 요소를 정확히 찾아야 합니다.
1
2
3
4
5
6
7
8
9
10
11
12
13
// ID로 요소 선택 (가장 빠르고 일반적)
const title = document.getElementById('main-title');

// CSS 선택자를 이용한 단일 요소 선택 (매우 유용)
const container = document.querySelector('.container');

// CSS 선택자를 이용한 여러 요소 선택
const allItems = document.querySelectorAll('.list-item');

// 선택한 요소에서 다른 요소 탐색
const parentOfTitle = title.parentNode; // 부모 노드
const firstChildOfContainer = container.firstElementChild; // 첫 번째 자식 요소
const nextItem = allItems[0].nextElementSibling; // 다음 형제 요소
querySelector와 querySelectorAll은 현대적인 방법으로, CSS 선택자를 그대로 사용할 수 있어 매우 강력하고 편리합니다.
요소 생성 및 추가 (Creating & Adding)
새로운 HTML 요소를 만들어 페이지에 추가할 수 있습니다.
1
2
3
4
5
6
7
8
9
10
11
12
13
// 1. 새로운 <li> 요소 생성
const newItem = document.createElement('li');

// 2. 텍스트 노드를 만들어 내용 채우기
const itemText = document.createTextNode('새로운 아이템');
newItem.appendChild(itemText);

// 3. 클래스 속성 추가
newItem.classList.add('list-item');

// 4. 원하는 위치(ul 태그 안)에 추가
const list = document.querySelector('.my-list');
list.appendChild(newItem);
요소 수정 및 삭제 (Modifying & Removing)
기존 요소의 내용, 속성, 스타일을 바꾸거나 요소를 아예 삭제할 수도 있습니다.
1
2
3
4
5
6
7
8
9
10
11
12
13
14
15
16
const title = document.getElementById('main-title');

// 내용 변경 (textContent를 사용하는 것이 보안상 더 안전)
title.textContent = '새로운 제목입니다!';

// 속성 변경
const image = document.querySelector('img');
image.setAttribute('src', '/path/to/new-image.jpg');

// 스타일 변경
title.style.color = 'blue';
title.style.fontSize = '24px';

// 요소 삭제
const itemToRemove = document.getElementById('item-to-delete');
itemToRemove.remove(); // 가장 간단한 방법
주의: innerHTML 속성을 사용하면 텍스트뿐만 아니라 HTML 태그도 삽입할 수 있어 편리하지만, 사용자가 입력한 값을 그대로 넣을 경우 XSS(Cross-Site Scripting) 공격에 취약해질 수 있습니다. 신뢰할 수 없는 데이터에는 항상 textContent를 사용하는 것이 안전합니다.
3. DOM의 진화: Shadow DOM과 Virtual DOM
웹 애플리케이션이 점점 더 복잡해지면서 표준 DOM만으로는 해결하기 어려운 문제들이 생겨났습니다. 바로 캡슐화(Encapsulation)와 성능(Performance) 문제입니다. 이를 해결하기 위해 Shadow DOM과 Virtual DOM이라는 개념이 등장했습니다.
Shadow DOM: 캡슐화의 제왕
Shadow DOM은 웹 컴포넌트(Web Components) 기술의 핵심으로, 특정 DOM 요소 아래에 “숨겨진” 독립적인 DOM 트리를 만드는 기술입니다. 이 숨겨진 트리는 메인 문서의 DOM과 완전히 분리되어 작동합니다.
-
개념:
<video>태그를 생각해보세요. 우리는 재생 버튼, 시간 표시 막대, 볼륨 조절 슬라이더를 보지만, 이 컨트롤들을 구성하는 수많은<div>나<input>태그는 HTML에 보이지 않습니다. 이것이 바로<video>요소의 Shadow DOM 안에 캡슐화되어 있기 때문입니다. -
핵심 장점: 완벽한 캡슐화. Shadow DOM 내부의 스타일(CSS)은 외부로 새어 나가지 않고, 외부의 스타일도 내부에 영향을 주지 않습니다. 자바스크립트 역시 분리되어 있어, 거대한 애플리케이션에서도 스타일 충돌이나 스크립트 오류 없이 재사용 가능한 컴포넌트를 만들 수 있습니다.
1
2
3
4
5
6
7
8
9
10
11
12
// #shadow-host 요소에 Shadow DOM 연결
const host = document.querySelector('#shadow-host');
const shadowRoot = host.attachShadow({ mode: 'open' });

// Shadow DOM 내부에 h2 요소 추가
shadowRoot.innerHTML = `
  <style>
    /* 이 스타일은 Shadow DOM 안에서만 적용됩니다. */
    h2 { color: red; }
  </style>
  <h2>이것은 Shadow DOM 내부의 제목입니다.</h2>
`;
Virtual DOM: 성능을 위한 청사진
Virtual DOM(VDOM)은 실제 DOM의 구조를 자바스크립트 객체로 메모리상에 표현한 가상의 DOM입니다. 이것은 브라우저 표준이 아니라, React나 Vue 같은 라이브러리/프레임워크가 성능 최적화를 위해 사용하는 프로그래밍 패턴입니다.
-
개념: 실제 DOM을 직접 조작하는 것은 비용이 큰(느린) 작업입니다. Virtual DOM은 상태(State)가 변경될 때마다 전체 UI를 메모리상의 Virtual DOM에 먼저 렌더링합니다. 그리고 이전 Virtual DOM과 비교하여 바뀐 부분만을 찾아냅니다(이 과정을 Diffing이라 합니다). 마지막으로, 이 변경 사항들을 모아서 한 번에 실제 DOM에 적용합니다(이 과정을 Reconciliation이라 합니다).
-
핵심 장점: 성능 최적화. 불필요하고 반복적인 DOM 조작을 최소화하여 애플리케이션의 반응성을 높입니다. 개발자는 단지 상태가 어떻게 변할지만 선언적으로 작성하면, Virtual DOM이 가장 효율적인 DOM 업데이트 방법을 알아서 처리해줍니다.
한눈에 보는 비교
| 구분 | 표준 DOM (Standard DOM) | 섀도 DOM (Shadow DOM) | 가상 DOM (Virtual DOM) |
|---|---|---|---|
| 목적 | 문서의 구조를 표현하고 제어 | 요소의 내부 구조를 캡슐화 | DOM 업데이트 성능 최적화 |
| 핵심 장점 | 웹 페이지의 표준 인터페이스 | 스타일 및 스크립트의 분리 | 변경사항만 효율적으로 적용 |
| 범위 | 브라우저 표준 | 브라우저 표준 (웹 컴포넌트) | 라이브러리/프레임워크의 패턴 |
결론
DOM은 웹 페이지의 뼈대이자, 자바스크립트가 웹과 상호작용하는 유일한 통로입니다. 개발자는 이 DOM을 직접 조작하여 동적인 웹 페이지를 만들 수 있습니다.
하지만 애플리케이션이 복잡해지면서 재사용 가능한 독립적인 컴포넌트를 만들기 위해 Shadow DOM이 등장했고, 빈번한 데이터 변경에 따른 성능 저하 문제를 해결하기 위해 Virtual DOM이라는 혁신적인 패턴이 탄생했습니다.
결국, 이 모든 기술은 DOM을 더 효율적이고 구조적으로 다루기 위한 노력의 산물입니다. 따라서 React나 Vue 같은 프레임워크를 사용하더라도, 그 근간에 있는 DOM의 작동 원리를 깊이 이해하는 것은 모든 프론트엔드 엔지니어에게 필수적인 역량입니다.