


Terminal Setting
Customizing MacOS Terminal
1. Transforming Terminal with Oh My Zsh
What is Oh My Zsh?
Oh My Zsh is an open-source framework that makes your terminal both vibrant and powerful. By using the Zsh shell instead of Bash, you can significantly improve your terminal’s productivity.
Installation Method
Run the following command in your terminal:
1
sh -c "$(curl -fsSL https://raw.githubusercontent.com/ohmyzsh/ohmyzsh/master/tools/install.sh)"
Theme Configuration
One of Oh My Zsh’s biggest advantages is its variety of themes. You can change themes by modifying the .zshrc file:
1
2
3
4
5
# Open ~/.zshrc file
vim ~/.zshrc

# Modify the ZSH_THEME line
ZSH_THEME="agnoster"  # One of the popular themes
2. Terminal Color Customization
Installing iTerm2
Instead of the default terminal app, using iTerm2 provides more customization options.
- Download from iTerm2 official website or Install via Homebrew:
brew install --cask iterm2 - Install Fira code font:
brew install font-fira-code - Find desired color preset: Visit https://iterm2colorschemes.com/ and save the desired color scheme using Save Link As.
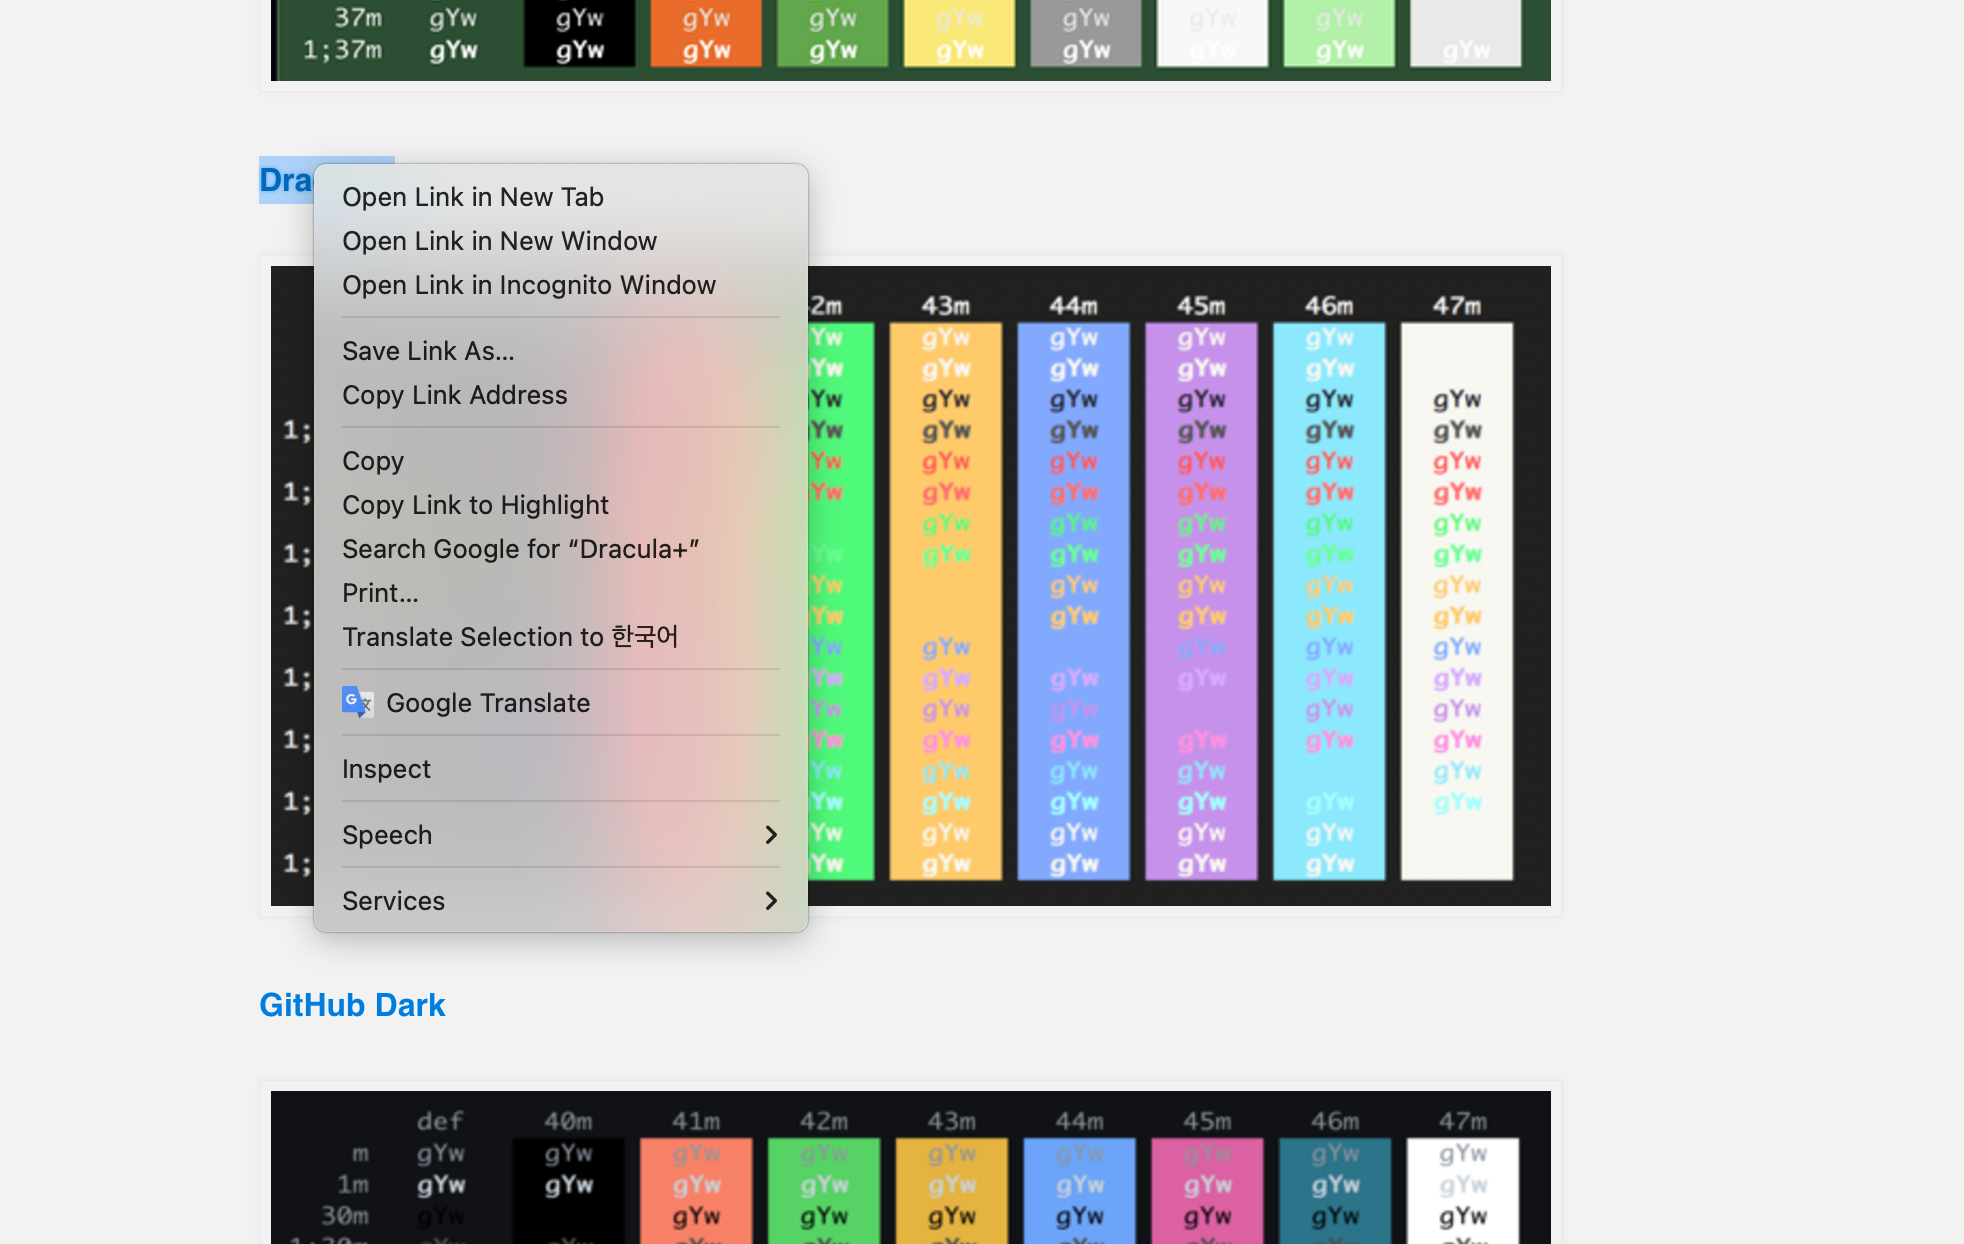
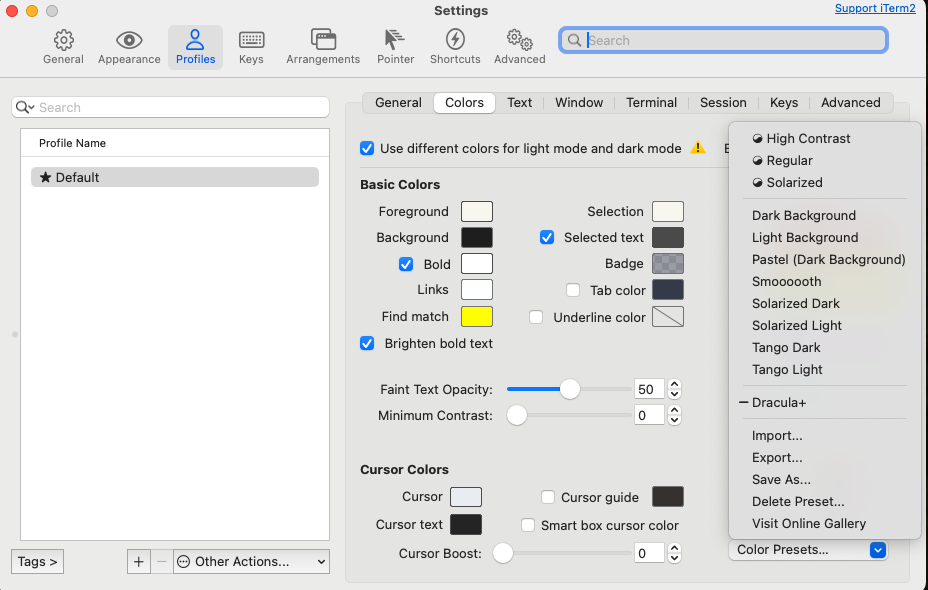
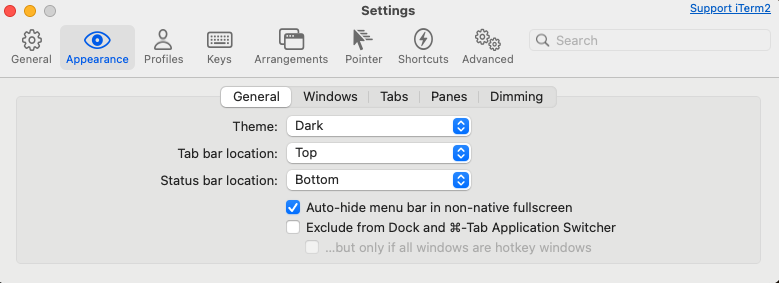
- Launch iTerm2 and enter settings. Go to the Color tab and select the saved Dracula+ theme.
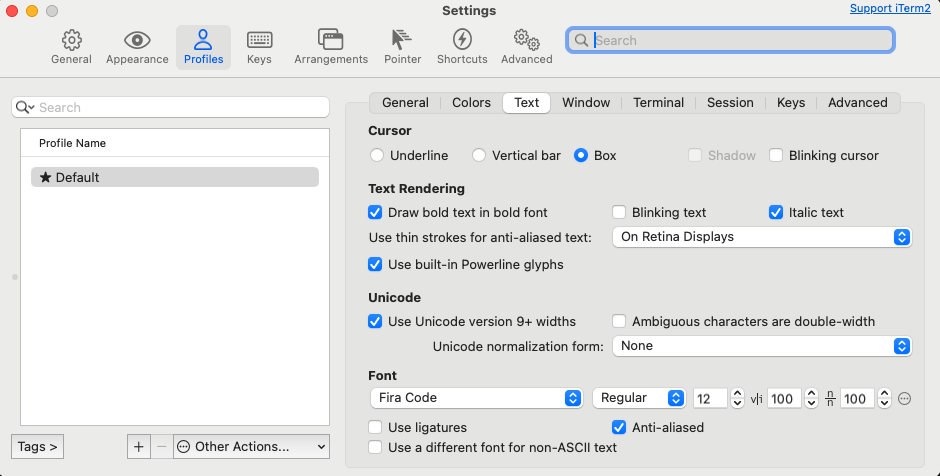
- In the Text tab, set Fira Code font.
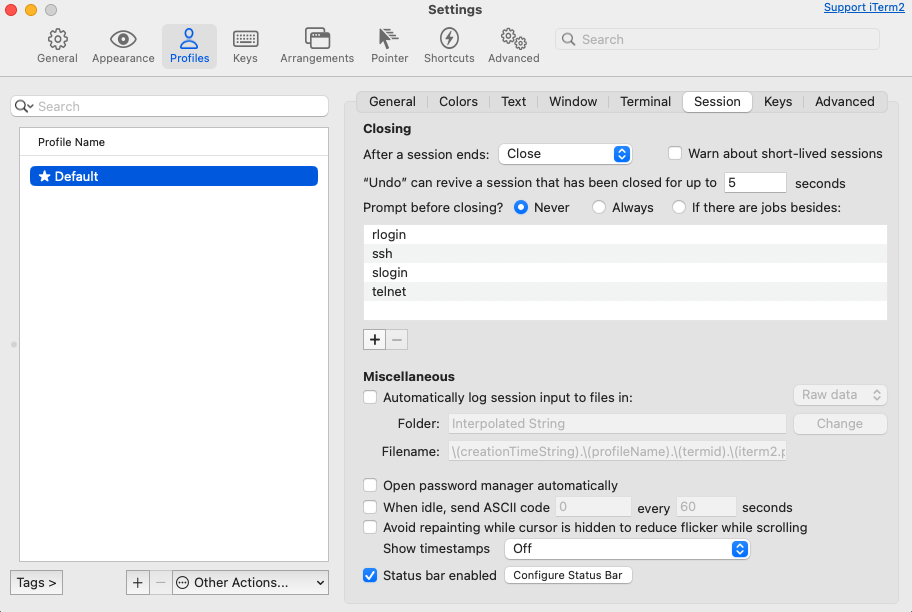
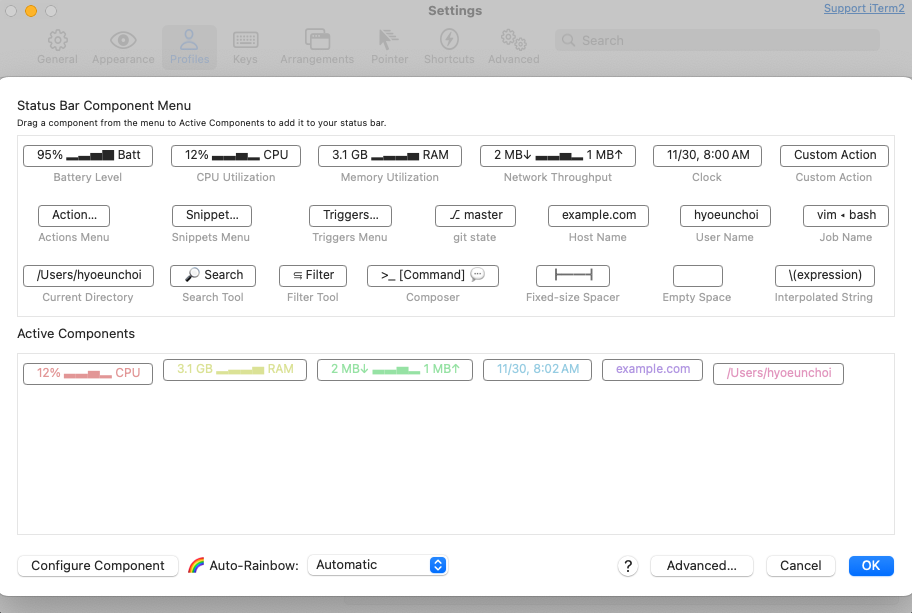
- In the Session tab, check Status bar enabled and drag and drop desired settings in Configure Status Bar. Position is in Appearance.
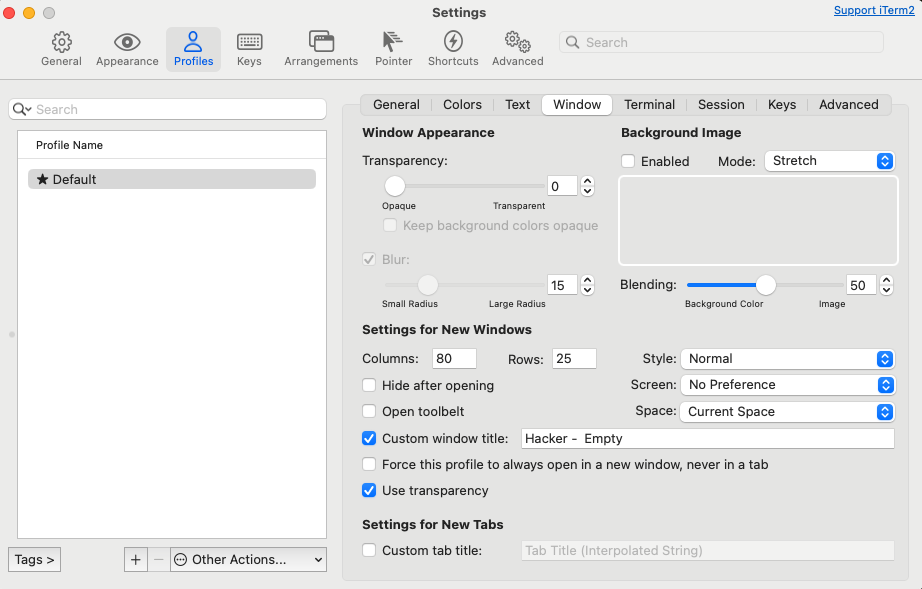
- In the Window tab, you can change the window title.
3. Useful Plugins
Recommended Zsh Plugins
- zsh-autosuggestions: Autocomplete based on previous commands
- zsh-syntax-highlighting: Command syntax highlighting
Plugin Installation Example
1
2
3
4
5
6
# Install plugins via Homebrew
brew install zsh-autosuggestions zsh-syntax-highlighting

# Add the following lines to ~/.zshrc
source $(brew --prefix)/share/zsh-autosuggestions/zsh-autosuggestions.zsh
source $(brew --prefix)/share/zsh-syntax-highlighting/zsh-syntax-highlighting.zsh
~/.zshrc File Configuration
1
2
3
4
5
6
7
# Replace the device name with your desired name
prompt_context() {
  emojis=("🦊" "🐱" "🐶" "🐼" "🐯" "🦁")
  nickname="Hacker"
  RAND_EMOJI_N=$(( $RANDOM % ${#emojis[@]} + 1))
  prompt_segment black default "${nickname} ${emojis[$RAND_EMOJI_N]} "
}
4. Productivity Enhancement Tips
Shortcuts
Ctrl + A: Move cursor to line startCtrl + E: Move cursor to line endCtrl + R: Search command history
Recommended Tools
- fzf: Fuzzy file finder
- bat: A better alternative to the cat command
- tldr: Command usage summary tool
맥OS 터미널 꾸미기
1. Oh My Zsh로 터미널 변신하기
Oh My Zsh란?
Oh My Zsh는 터미널을 화려하고 강력하게 만들어주는 오픈소스 프레임워크입니다. Bash 대신 Zsh 셸을 사용하여 터미널의 생산성을 크게 향상시킬 수 있습니다.
설치 방법
터미널에서 다음 커맨드를 실행하세요:
1
sh -c "$(curl -fsSL https://raw.githubusercontent.com/ohmyzsh/ohmyzsh/master/tools/install.sh)"
테마 설정
Oh My Zsh의 가장 큰 장점 중 하나는 다양한 테마입니다. .zshrc 파일을 수정하여 테마를 변경할 수 있습니다.
1
2
3
4
5
# ~/.zshrc 파일 열기
vim ~/.zshrc

# ZSH_THEME 라인을 수정
ZSH_THEME="agnoster"  # 인기 있는 테마 중 하나
2. 터미널 색상 커스터마이징
iTerm2 설치
기본 터미널 앱 대신 iTerm2를 사용하면 더 많은 커스터마이징 옵션을 얻을 수 있습니다.
- iTerm2 공식 웹사이트에서 다운로드
- Homebrew로 설치:
brew install --cask iterm2 - Fira code 폰트 설치:
brew install font-fira-code - 원하는 컬러 프리셋 찾기: https://iterm2colorschemes.com/ 원하는 컬러를 Save Link As로 저장합니다.
- iTerm2를 실행하여 설정창에 들어갑니다. 이후 Color 탭에서 저장한 Dracula+를 선택합니다.
- Text 탭에서는 Fira Code를 설정합니다. 그리고 Normalization을 HFS+로 바꿉니다.
- Session 탭에서 Status bar enabled를 체크하고 Configure Status Bar에서 원하는 셋팅들을 드래그 앤 드랍합니다. 위치는 Appearance
- Window 탭에서 window title을 바꿀 수 있습니다.
3. 유용한 플러그인
Zsh 플러그인 추천
- zsh-autosuggestions: 과거 명령어 기반 자동 완성
- zsh-syntax-highlighting: 명령어 문법 하이라이트
플러그인 설치 예시
1
2
3
4
5
6
# Homebrew로 플러그인 설치
brew install zsh-autosuggestions zsh-syntax-highlighting

# ~/.zshrc에 다음 라인 추가
source $(brew --prefix)/share/zsh-autosuggestions/zsh-autosuggestions.zsh
source $(brew --prefix)/share/zsh-syntax-highlighting/zsh-syntax-highlighting.zsh
~/.zshrc 파일 설정
1
2
3
4
5
6
7
# 앞의 디바이스 이름 대신에 원하는 이름으로 지정하기.
prompt_context() {
  emojis=("🦊" "🐱" "🐶" "🐼" "🐯" "🦁")
  nickname="Hacker"
  RAND_EMOJI_N=$(( $RANDOM % ${#emojis[@]} + 1))
  prompt_segment black default "${nickname} ${emojis[$RAND_EMOJI_N]} "
}
4. 생산성 향상 팁
단축키
Ctrl + A: 라인 시작으로 커서 이동Ctrl + E: 라인 끝으로 커서 이동Ctrl + R: 명령어 히스토리 검색
유용한 도구 추천
- fzf: 퍼지 파일 검색기
- bat: cat 명령어의 더 나은 대안
- tldr: 명령어 사용법 요약 도구